
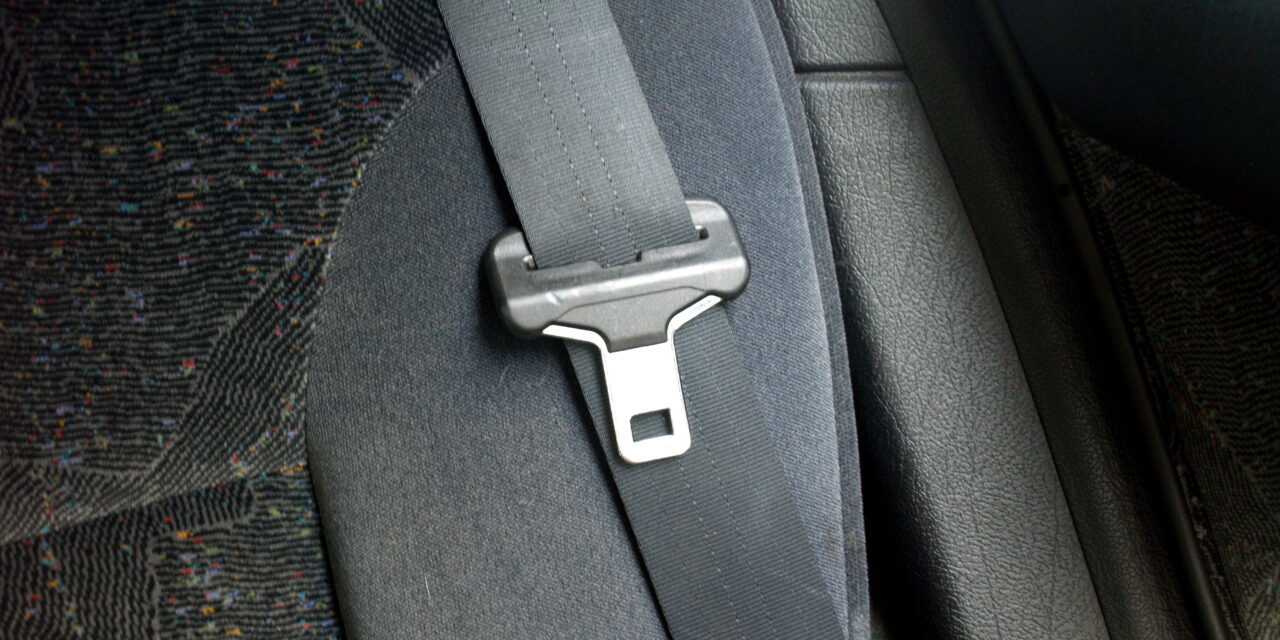
Is that worn seat belt still MOT-safe? The cuts, fraying and DIY fixes that can fail your car
If a seat belt still clicks into the buckle, plenty of drivers assume it will be fine for the MOT. That is a risky bet. A belt can look almost usable from the driver’s seat and still fail because the webbing is cut, frayed, stretched or clearly reworked.
This matters more than it used to. DVSA clarified its MOT guidance from 1 December 2024 to spell out how testers should judge seat belt webbing damage, including when cuts across the belt move into major-fail territory. If your belt has a nick on the edge, a worn patch where it rubs on trim, or signs that someone has tried a home repair, it is worth checking before test day rather than hoping it gets waved through.
The short answer
Yes, a worn or damaged seat belt can fail an MOT in the UK. A major defect can be recorded if the seat belt is not functioning as intended, if the retractor or buckle is not working properly, or if damage to the webbing is serious enough to weaken the belt or affect how it operates.
DVSA’s updated guidance says testers must check for cuts, damage, fluffing, fraying and evidence of overstretching. It also makes clear that some damage thresholds are now treated more explicitly.
What changed in the guidance
In MOT special notice 04-24, DVSA said the inspection manual wording on seat belts was being updated so it was clearer on what counts as a fail. The change applies from 1 December 2024.
The key point is that testers are told to check seat belt webbing for:
- cuts
- damage
- fluffing
- fraying
- evidence of overstretching
DVSA also says seat belt operation must not be affected by any damage. Signs of overstretching count as a deficiency, and cuts or damage across the belt can become a major fail if:
- the cut is on either edge of the webbing and is more than 2mm
- the damage is away from the edges and is more than 4mm
- the damage is anywhere on a child seat belt or restraint that is securely attached to the vehicle
That does not mean anything smaller automatically passes. It means the clearer major-fail thresholds are now spelled out, while other damage can still be judged in context if it weakens the belt or affects how it works.
What MOT testers actually look at
A seat belt inspection is not only about whether the belt clicks into place. Testers are looking at the whole restraint system. That includes:
1. Webbing condition
They will check for cuts, fraying, fluffing, burn marks, stretching and other damage. A shiny polished section where the fibres have thinned, or a rough section where the belt has been rubbing on trim for months, is not something to ignore.
2. Belt operation
If damage is stopping the belt from feeding through smoothly, retracting properly or sitting correctly across the occupant, that can count against it even before you get into exact cut measurements.
3. Buckle and latch
The buckle has to latch securely and release properly. A belt with perfect webbing can still fail if the clasp is unreliable.
4. Retractor
A belt that stays slack, bunches up or fails to take up excess webbing can also trigger a fail. If your issue is more about slow retraction than visible wear, our guide to seatbelt not retracting and the MOT covers that side of the test in more detail.
5. Signs of tampering or bodged repairs
This is where some drivers get caught out. The MOT guidance is clear that reworked webbing is a problem. Knots in the belt webbing are a fail, and DVSA has also highlighted examples such as fraying or fluffing being removed or sealed by burning. In plain English, if someone has tried to repair the belt instead of replacing it, expect trouble.
Damage that is especially likely to fail
Some faults are much harder to argue away than others. These are the ones that should put replacement high on the list:
- a cut on the edge of the belt that is clearly more than 2mm
- damage across the middle of the belt that is more than 4mm
- obvious fraying where fibres are separating
- stretched webbing after a crash or heavy load
- melted, singed or heat-damaged sections
- knots, stitching, staples, glue or any homemade repair
- child seat belt damage of any real significance
The reason is simple. A seat belt is designed to spread crash forces through intact webbing. Once the fibres are compromised, the belt may not behave as designed in a collision.
What about a tiny nick or light fluffing?
This is the grey area drivers tend to obsess over. A tiny surface mark is not the same as a proper cut, and a belt does not fail just because it looks a bit old. But if you can see fibres lifting, edge damage growing, or the belt feels thin in one spot, it is worth having it checked professionally.
Do not assume that because the belt passed last year it will pass this year. A lot of belt damage gets worse slowly, especially if the same section is dragged over a sharp trim edge every day.
Why DIY fixes are a bad idea
There is a stubborn myth that you can tidy up a seat belt with a lighter, trim away frayed fibres or stop a small split getting worse with a quick stitch. That is exactly the sort of thing that can turn a marginal belt into an obvious fail.
DVSA’s guidance specifically flags reworked webbing as a problem, and the Matters of Testing blog has repeatedly shown the sort of horror-story repairs testers come across. A seat belt is a safety-critical part, not a cosmetic trim piece. If it is damaged enough to tempt you towards a repair, it is usually damaged enough to justify proper replacement.
When replacement is the sensible move
In practice, replacement is usually the right answer if:
- the damage is visible without hunting for it
- the belt has been cut, melted or badly frayed
- the belt has signs of overstretching after an impact
- the retractor and the webbing are both suspect
- someone has already tried to repair it
Used replacement belts can look tempting, but be careful. Unless you know the donor car’s history, you do not really know whether the belt has been crash-loaded, stored badly or damaged in removal. A new or known-good part from a reputable source is the safer route.
Pre-MOT checks you can do at home
You do not need to dismantle the interior to do a useful seat belt check. Before the MOT, look for:
- edge cuts and nicks on the webbing
- worn or fluffy patches where the fibres are lifting
- signs of the belt rubbing on plastic trim or a seat frame
- melted spots, shiny hardened areas or burn marks
- slack retraction or bunching near the upper guide
- buckle faults or sticky release buttons
Pull the belt fully out in good light and inspect the whole length, not just the bit you normally see. A lot of damage sits low down near the buckle or higher up near the shoulder guide.
If you are buying a used car, treat worn belts as a warning sign
A tired seat belt can tell you something about how a car has been treated. Heavy belt wear may simply mean years of use, but it can also suggest neglected maintenance, previous accident damage or cheap interior repairs. If you are already checking a used car’s history, make the belts part of the walkaround rather than an afterthought.
That matters because an MOT pass is not a guarantee that every safety detail is healthy. Our guide on how to read a used car’s MOT history before you buy explains why the paperwork needs context.
The bottom line
If your seat belt is visibly worn, do not treat it as one of those things to leave until after the MOT. The current DVSA guidance is clearer than before, and it gives testers firmer backing where webbing damage is obvious.
A small cosmetic mark may not spell instant failure, but cuts, fraying, overstretching and DIY repairs are the kind of faults that can turn a pass into a major defect very quickly. On a safety-critical part like this, the smart move is simple: inspect it early, and if in doubt, replace it properly before test day.



Trackbacks/Pingbacks