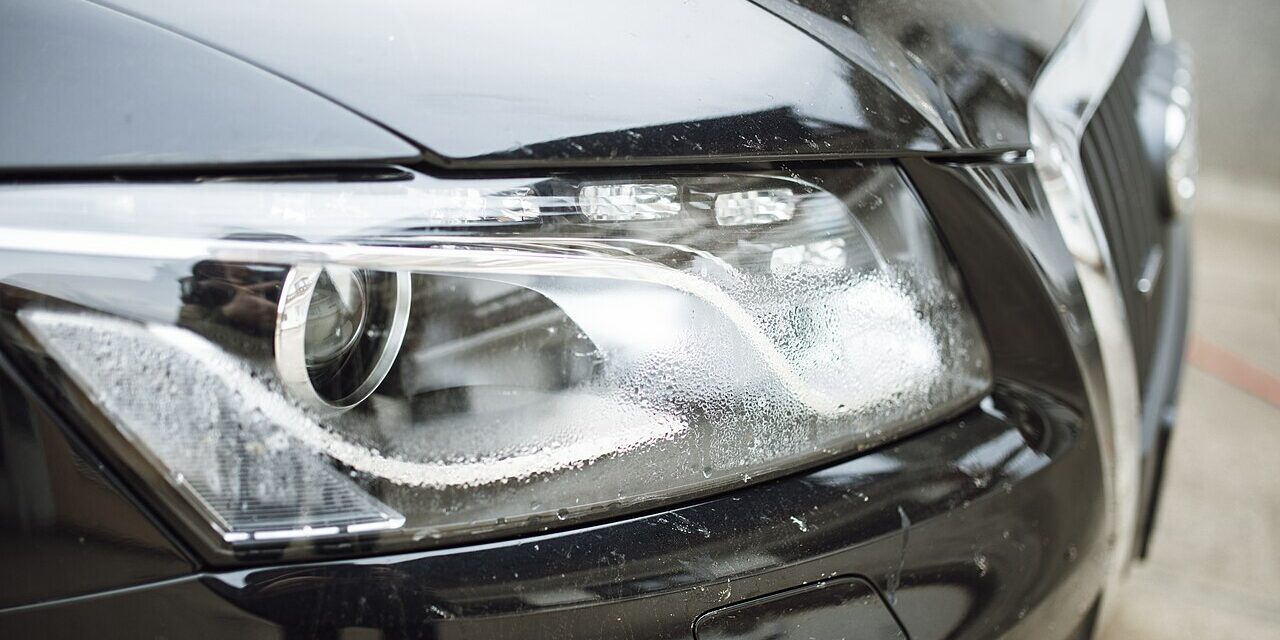
Seeing mist, droplets or a visible water line inside a headlight is unsettling, particularly on a newer car with sealed lamp units. It is not automatically an emergency, and it is not automatically an MOT failure either. The useful distinction is between light, short-lived condensation and water that remains in the unit or starts to affect how the lamp works.
Before agreeing to a replacement headlamp, dry the car, look closely at the pattern of moisture and test the light. A few minutes of sensible checking can tell you whether you are looking at normal temperature change, a failed seal or a lamp that needs prompt attention.
Why condensation forms inside a headlight
Headlamp housings are not vacuum flasks. They heat up when the lamps are on, cool down when parked and normally have vents to manage pressure changes. Moist air can therefore enter and settle on the colder inside surface of the lens. A light, even haze after a wet or cold journey can disappear as the unit warms up.
That is different from standing water, large droplets that keep returning, a distinct tide mark or moisture that remains after several dry journeys. Those signs point more strongly to an issue with a rear cover, bulb seal, vent, lens-to-housing seal or damage to the lamp itself.
Start with this five-minute check
- Switch on dipped beam and check both sides. Look for a dimmer lamp, flickering, a changed beam pattern or a warning message. Compare the affected side with the other headlight.
- Look for the amount and position of water. A thin mist across part of the lens is not the same as droplets collecting at the bottom of the unit.
- Inspect the outside carefully. Check for a crack, impact mark, missing rear cap or a lamp that is loose in the bodywork.
- Check after a dry drive. If the lamp clears after it has warmed up and stays clear, record that rather than rushing to replace it. Do not open a modern lamp unit merely to chase a small amount of mist.
- Check the other electrical functions nearby. Try main beam, indicators, daytime running lights and sidelights where they share the same unit. Stop using the car at night if the affected headlamp is unreliable.
When it becomes a repair job
Book an inspection rather than waiting for the next service if water is pooling, the headlight repeatedly fills after rain or washing, the lens is cracked, or the lamp is visibly dimmer or intermittent. Moisture can corrode bulb holders, connectors and internal reflectors. On LED or xenon units, where components are integrated and replacement costs can be substantial, it is especially worth establishing whether the car is still within a manufacturer or used-car warranty before anyone dismantles the unit.
A garage can check the rear access cover, bulb seal and breather arrangement first. These are usually more proportionate places to start than ordering a complete lamp. If the lens or bonded housing has failed, however, a replacement unit may be the durable repair. Trying to seal a cracked lens with household adhesive can trap moisture, spoil the beam pattern and make a proper repair harder later.
Could headlight condensation fail an MOT?
The MOT is concerned with whether mandatory headlamps are present, secure, in suitable condition, work properly and are correctly aimed. The DVSA inspection manual for lamps and electrical equipment sets out those checks.
So the question is not simply whether any moisture can be seen. The practical issue is whether the condition has damaged the lamp, reduced light output, distorted the beam, created an insecure unit or caused an electrical fault. A headlamp that is dim, flickers, contains standing water or has a damaged lens is much more likely to need attention before test day than one that briefly mists and then clears.
Do not use the MOT as the first diagnosis. If visibility is poor, the lamp is not working correctly or you can see water around electrical connections, get it checked before driving in the dark or in heavy rain. Headlights are safety equipment, not a cosmetic extra.
Do not drill holes or use a hairdryer
Internet fixes can make a marginal problem expensive. Drilling a housing changes the way the lamp is sealed and vented. A hairdryer or heat gun can warp plastic, damage coatings or push moisture towards electrical parts. Removing a cap with the lamp hot also risks burns and may let more dirt into the unit.
If you need to look behind a removable rear cover, wait until the lamp is cool, follow the vehicle handbook and make sure the cover is refitted squarely. Avoid touching a halogen bulb’s glass with bare fingers. If the lamp has high-voltage xenon equipment, do not attempt electrical work yourself.
What to tell the garage
A good description shortens the diagnosis. Say whether the moisture appeared after rain, a car wash, a bulb change, a minor collision or a period of cold weather. Mention how long it takes to clear, whether there is any water at the bottom of the unit and whether a warning light has appeared. A photo taken before the drive can help, because light condensation may have disappeared by the time you arrive.
Ask the garage to identify the entry route before quoting for a full headlight assembly. If a lamp is being replaced because it has failed internally, ask whether the old unit shows a damaged seal, missing cover or blocked vent that could also affect the other side.
The sensible bottom line
Light misting that clears can be monitored. Repeated droplets, pooled water, a crack, poor light output or electrical symptoms deserve a prompt inspection. The aim is not to panic over every trace of vapour, but to catch a sealing or electrical problem before it affects night-time visibility, an MOT or a costly lamp unit.
Featured photo: Shixart1985 via Wikimedia Commons, CC BY 2.0.